
Apple’s AirPods Pro wireless earbuds feature a new, innovative force sensor on each stem that responds to gestures which you can use to play/pause and skip tracks, answer and hang up phone calls, and switch between Active Noise Cancellation and Transparency modes.
By default, you can press and hold either AirPod Pro stem to cycle between the Noise Cancellation and Transparency modes (you’ll hear a tone when switching between the two functions). You can also customize the press-and-hold gestures by accessing onscreen menus on your connected iOS device. Here’s how it works.
- Allow your AirPods to connect to your iPhone or iPad in the usual way, by opening the case next to your device and inserting the buds in your ears.
- Launch the Settings app on your iOS device.
- Tap Bluetooth.
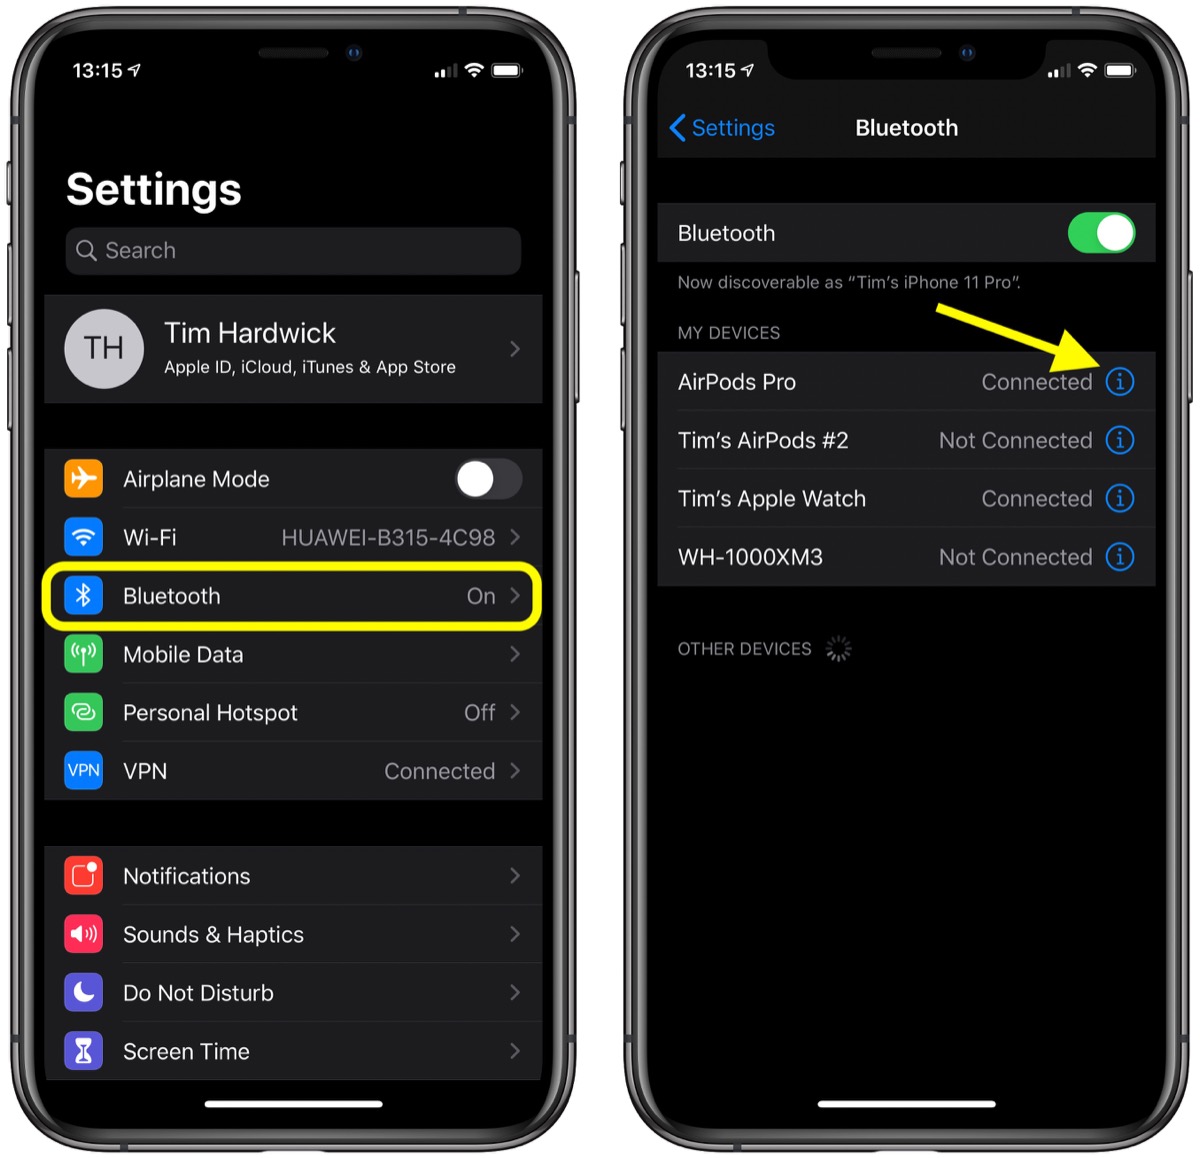
- Under “My Devices,” tap the information icon (the circled “i”) next to AirPods Pro in the list.
- Under “Press and Hold AirPods,” tap Left or Right, depending on which AirPod you want customize.

- To activate Siri with a press-and-hold gesture, tap Siri.
- To change the Noise Control features that are activated via a press-and-hold gesture, tap Noise Control so that it’s ticked, then tap the functions below that you want to assign to it: The options are Noise Cancellation, Transparency, and Off (which disables noise cancellation and transparency mode).
Note that you can assign more than one noise control feature to the press-and-hold gesture on either earbud – pressing and holding the stem will cycle between the selected modes.
This article, “How to Customize the Force Sensor Gesture Functions on AirPods Pro” first appeared on MacRumors.com
Discuss this article in our forums
Powered by WPeMatico